First of all, what’s color management? Color management is a process that allows you to achieve consistent color representations across different devices, such as digital cameras, scanners, printers, and monitors. The key concept in color management is color space — a model that describes the way colors can be represented as numbers. The Dry Creek Photo page explains it best:
A color space provides the definition for what color the numerical combination represents. Color spaces are akin to languages. A value such as 88/249/17 is given meaning by the color space in the same way as an otherwise random sound has meaning in a particular language. If our example of 88/249/17 is interpreted using the Adobe RGB color space, it is a vibrant, attention getting green. If, on the other hand, the same value is interpreted using the sRGB color space, it is a pale, sickly yellowish-green.
In most cases, you don’t have to worry about color management (see Ken Rockwell’s explanation why color management is a non-issue for most photographers). But if you do need to take control of colors, digiKam’s got you covered.

To enable the color management feature in digiKam, choose Settings -> Configure digiKam, switch to the Color Management section, and tick the Enable Color Management check box in the Behavior section. Next, choose the desired color space from the Working Color Space drop-down list. digiKam supports several color space models, including Adobe RGB and sRGB. Which one to choose depends, of course, on your needs (the sRGB vs. Adobe RGB article by Ken Rockwell provides an excellent overview of the two most popular color spaces). The Behavior section also allows you to specify how digiKam should handle photos with profiles that don’t match the working color space, images with no profiles, and raw files with uncalibrated colors.

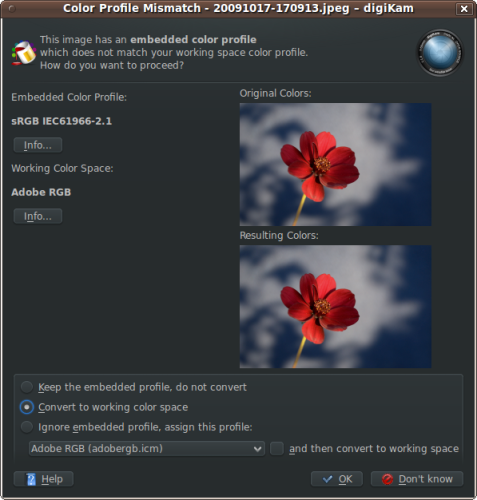
For example, you can set digiKam to display a color space conversion dialog when the photo you are about to edit uses a different color space than the one you selected in digiKam (see screenshot above).
In the Profiles section, you can specify color profiles for your monitor and peripherals such as camera, scanner, and printer. Obviously, you’d want to select the same color profiles as the working color space. Finally, in the Advanced section, you can enable the Use black point compensation feature which provides a way to adjust black levels of files to match the capabilities of digital devices to manage black.


